As an administrator, you have access to a control panel that the employees won’t be seeing.
This is where you handle the user data and the courses.
To create new users, you can upload a CSV spreadsheet with all the names and email addresses of the employees, or they can be entered one at a time.
Whenever a new user is created, the user/users are automatically notified with an email containing a unique password. (This feature can be disabled should this not be the desired method.)
CONTENT ON THIS PAGE
Whitelisting
How to add new users
– User import via excel sheet
– How to create a group leader
– Welcome email
Managing users – down the track
Send notification to all employees
– Automatic notification email about new course
– Advice to users at the first course
– Notificing users at the following courses
Reports about the users’ activities
– Block editor
WHITELISTING
In your organisation’s mail system, you will need to whitelist the domain againsthacking.com and the IP addresses 115.64.108.24 and 185.21.40.249 so that emails from this sender don’t get caught up in your mailsystem’s spamfilter.
HOW TO ADD NEW USERS
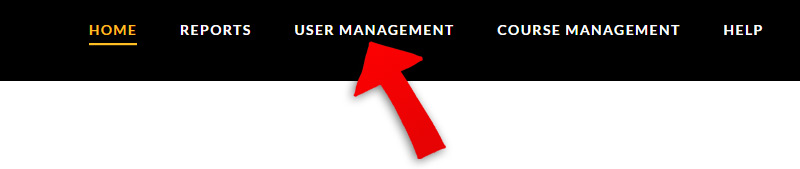
At the start page: Click on ”User Management” in the top menubar:
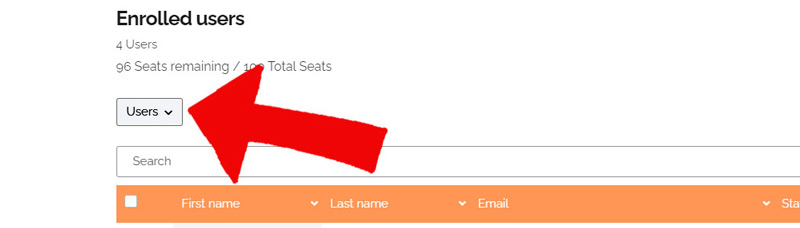
Click on the “Users” button:
There are several ways new users can be added.
• Click on “Add one” for single registration – i.e. if only a single user has to be entered into the system
• Click on “Add multiple” if more users need to be added without using a CSV sheet
• Click on “Upload users” if you want to bulk register a larger group from a list in a CSV document (Excel sheet)
USER IMPORT VIA EXCEL SHEET
If you have user data in an excel sheet, it must be converted to the comma-separated CSV format before you import it.
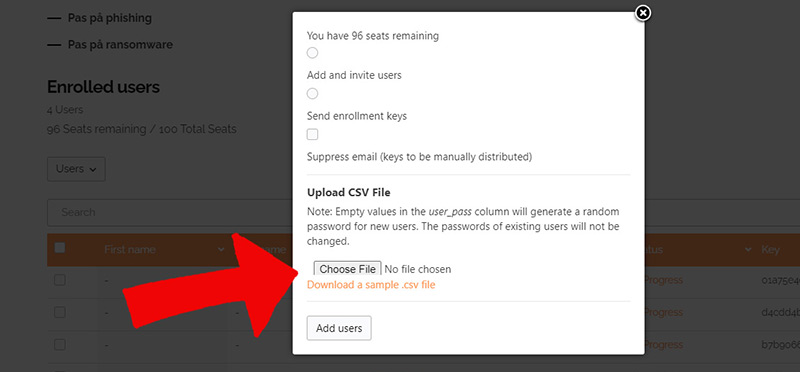
Click on “Download a sample csv file” if you want a template into which you can transfer your data:
To prepare a CSV sheet for import into LearnDash LMS:
1) Arrange the users in an Excel sheet like this:
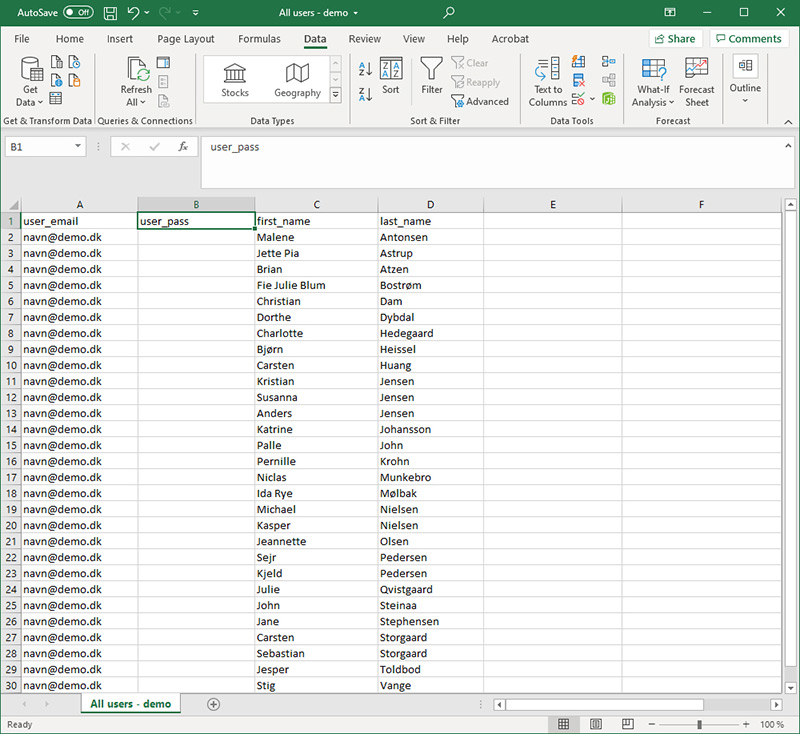
It is important the first line consists of the four specific “header codes”:
user_email | user_pass | first_name | last_name
If you do not want to predefine the users’ passwords, because you prefer them to be generated automatically by the LearnDash system, then simply leave the Password column empty, as shown above.
2) Select “Save As” and save the document as a comma-separated CSV file:

Click the “Choose File”-button to upload your CSV document.
You are now ready to press the button ‘Add users’, but wait! There are some things you need to know before pressing that button.
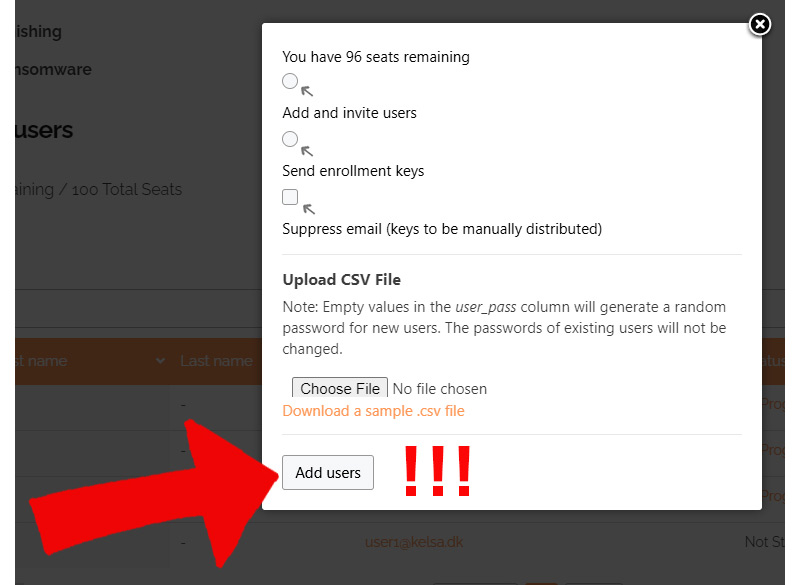
Add and invite users
Activate the button above the text line if you want an invitation email to be sent automatically the moment you click on the “Add users” button.
The new user will then be assigned a unique password automatically, or – if a password that has been pre-assigned to this person in the CSV-spreadsheet – the user will receive the pre-assigned password.
“Send enrollment keys”
Activate the button above the text line “Send enrollment keys” if you want the users to receive an email asking them to sign up and create their own password. In order to sign up, the user must submit an ”enrollment key”, a code, which is delivered in the email. NB: We don’t recommend using this method. People tend to find it confusing.
“Suppress email (keys to be manually distributed)”
Tick the check mark field above the “Suppress email”-text line if you do not want the user(s) to receive an invitation email.
Add users
Be careful before clicking here. It is when you press this button that an email goes out to all users who are registered – (unless of course the “Suppress email” field has been checked)
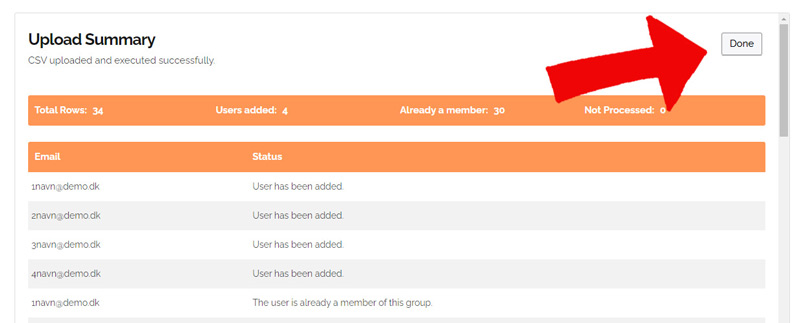
Click the “Done” button to end the upload process:
HOW TO CREATE A GROUP LEADER
You may want to share the administrative jobs with a colleague on your team. In that case, you can assign this person to be a “Group Leader”. This is done at the bottom on the User administration page.
WELCOME EMAIL
When a user has been added to the system, this person will automatically receive a welcome email.
The standard welcome email looks like this:
Mailheader-linje:
Velkommen til vores nye kursusplatform om cybersikkerhed
Hej #FirstName,
Velkommen til vores nye awareness-kursus om cybersikkerhed og persondata.
Du skal starte med at lave dit eget password. Det gør du ved at klikke her: #ResetPassword
Gem dette password, for du vil skulle bruge det hver gang du bliver tildelt et nyt kursus i den kommende tid.
Kursusplatformen finder du her: #SiteURL
Kontakt mig, hvis du har nogen spørgsmål.
Med venlig hilsen
#GroupLeaderInfo [Your name will be inserted here]
#GroupName [Your organisation’s name]
The bold words with a hashtag is where the appropiate details will be inserted.
Contact us if you’d like to change the content of the welcome email.
MANAGING USERS – DOWN THE TRACK
RECOMMENDED: EXPORT AND USE OF EXCEL SHEET
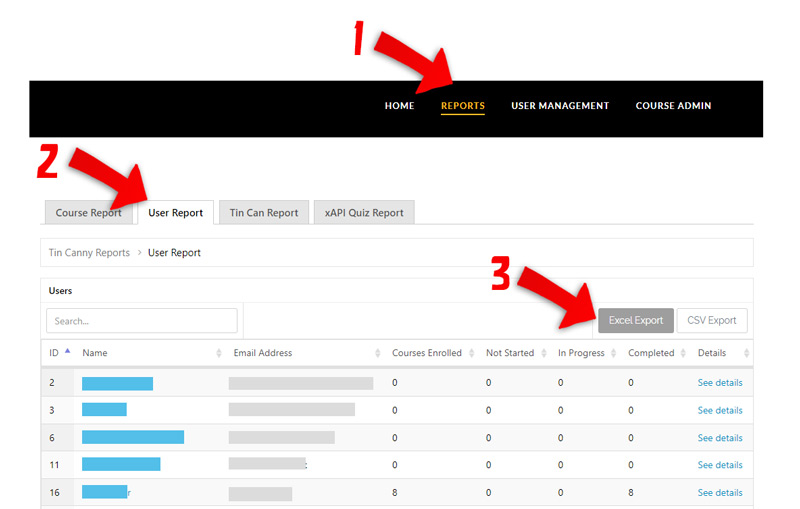
By downloading an excel sheet which shows you the current progress of all users, you are able to get a precise overview of how the employees are going, and you are then able to communicate directly with those who need a reminder – or a polite question from you whether they are in need of assistance.
To download the excel sheet, click on REPORTS in the top menubar (1), then click on User Report (2), and on the button “Excel Export” (3):
Once you have downloaded the excel sheet, you may have to press a button at the top to Enable Editing:

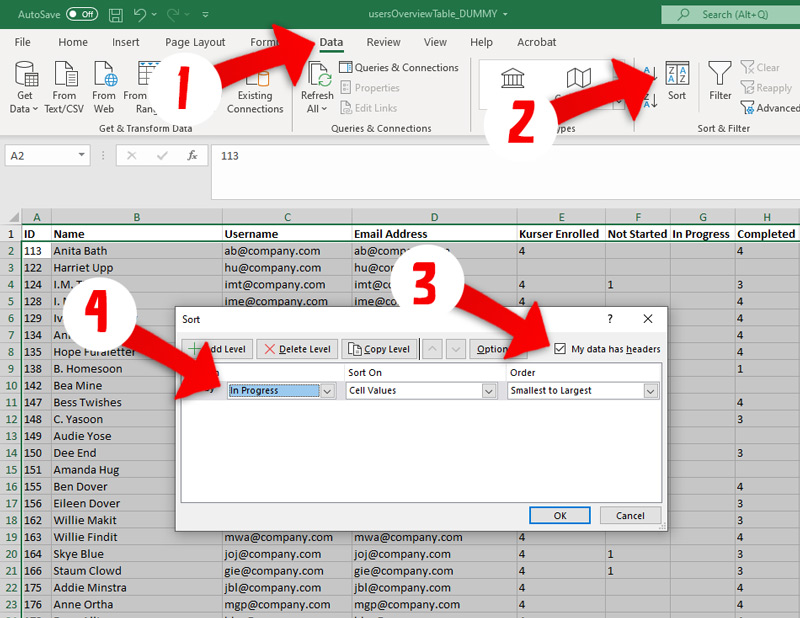
In the excel sheet, sort the users in a specific order according to your purpose.
For instance, if you want to contact those who have started but not yet completed a course, you can sort the users so that all those who have one course In Progress will be listed together.
In the excel sheet,
- Click on the top menu “Data”
- Click on “Sort”
- Tick the box “My data has headers”
- Choose the column “In Progress”
- Press “OK”
You can now copy the email adresses of those you want to contact over to a new email which you create in your mailbox. If you are contacting more than one employee, we recommend you use the BCC-field.
NOTIFICATIONS
AUTOMATIC NOTIFICATION EMAIL ABOUT NEW COURSE
We can send you a PDF which shows the text content of all the course-notification emails which go out to all users automatically when the respective course is launched.
Please advice us if you’d like to customise this text.
ONBOARDING USERS WHEN LAUNCHING THE FIRST COURSE
When users are created in Learndash LMS, an email is automatically sent to the user with their password. We call this specific type of email an “email-notification”.
The employees are instructed that they need to keep this password for future use.
Later on in the process, they may need a personal reminder about this from you as well.
NOTIFICING USERS AT THE FOLLOWING COURSES
You can contact your employees by using the LearnDash system, or you can simply send them an email from your own mailbox. We recommend that the email is sent manually from your own mailbox at least once in the beginning of the process, so that employees feel safe about what is happening and are made aware that emails will be coming from againsthacking.com. Make sure that the first line in each email is current, creative and in tune with recent events within the organisation.
To send a notification to all employees – for instance about a new course, that has been launched, or a reminder about taking a course:
Under User management: Click the ‘Users’-button, and tick all four fields (Completed, In progress, Not started, Not enrolled).
The email will then go out to all users.
HOW TO UNDERSTAND ”Completed” VERSUS “In progress”:
• ”Completed”: All courses associated with this user have been completed
• ”In progress”: Some courses are completed, others are not started
• ”Not started”: Not started any of the courses
• ”Not enrolled”: No course has been assigned to this user yet
REPORTS ABOUT THE USERS’ ACTIVITIES
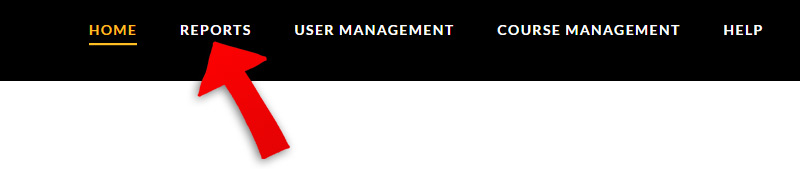
In the top bar: Click on the “Reports” menu.
Here you are able to see how far the employees have come, you can download spreadsheets with the data, and much more. You will find further explanation on the page itself.
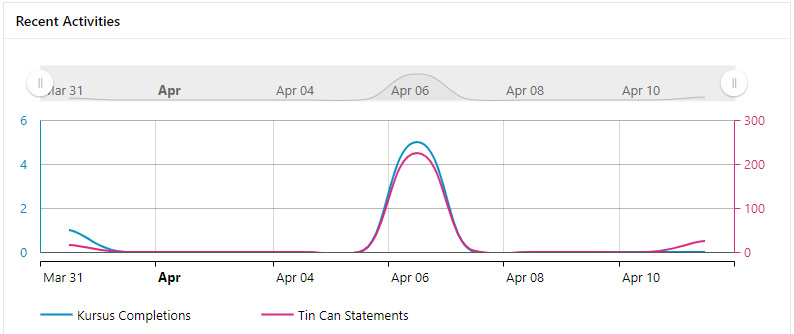
Tin Can Statements: Shows users’ activity level inside the courses – each time a user moves
from one page to the following is registered as one ‘activity’.
BLOCK EDITOR
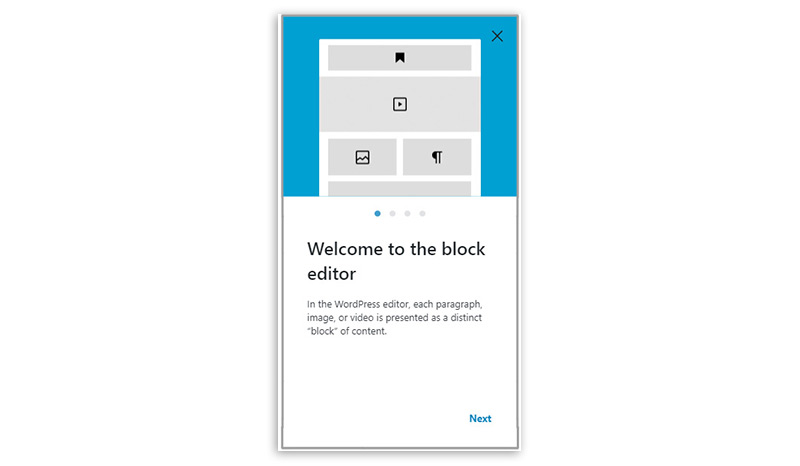
If this window from WordPress appears, you can just ignore it by clicking on the X in the top right corner.